Applying a wallpaper circle is luckily less difficult than many people think. If your wall is clean, smooth and dry and you work calmly, you can hang a wallpaper circle neatly, without a crooked result, wrinkles or annoying air bubbles. Whether you want to put up a small wall circle in the kids' room or choose a large round wallpaper as a focal point in the living room, with the right preparation you quickly get a beautiful result.
On this page you can read how to stick a wallpaper circle on your wall, which wall surface is suitable, what you need and what to watch out for with self-adhesive and glued versions. Do you want to choose the right version straight after reading? Then take a look at our wallpaper circles.
What do you need to apply a wallpaper circle?
For a neat result you do not need an extensive toolbox, but you do need the right basics. Exactly what you need depends on the type of wallpaper circle.
- a soft cloth to remove dust from the wall
- pencil for a light guide line
- level or straight edge to mark the center
- spatula or squeegee to smooth the wallpaper
- painter's tape for temporary positioning
- wallpaper glue if your wallpaper circle is not self-adhesive
- brush or roller for applying glue
Would you rather order everything at once? Take a look at our wallpaper tools for squeegees, cutting knives and levels.
If you use a self-adhesive wallpaper circle, you usually do not need glue. If it is a non-woven version that has to be glued, choose a glue that is suitable for non-woven wallpaper. On behang.nl you can order wallpaper glue along with it.
When is a wall suitable for a wallpaper circle?
The wall surface largely determines whether your wallpaper circle stays in place well. A smooth, clean and dry wall gives the best chance of a neat result. On a rough, powdery or greasy wall surface the material bonds less well, and you can more quickly see air bubbles, loose edges or irregularities.
In any case, watch out for these points:
- the wall must be free of dust and grease
- the wall surface must be dry, also with new plaster
- the wall must be as even as possible
- loose old wallpaper must be removed first
- a strong texture on the wall can stay visible under round wallpaper
Do you have a freshly plastered wall? Then always wait until it is completely dry. On a wall that is still damp, a wallpaper circle bonds less well. With a porous or highly absorbent wall surface, pretreatment is often smart, so the glue grabs more evenly and the circle dries more nicely. Read more about preparing the wall surface.
Before you start: how to choose the right spot
A wallpaper circle stands out even more when it is positioned well. That is why it is smart to first decide where the center should be. If you hang the circle above a sofa, bed, dresser or desk, look not only at the wall but also at the furniture below it. It usually looks calm if the circle visually hangs in the middle of the furniture.
Then draw a very light vertical guide line on the wall. This prevents the wallpaper circle from ending up crooked on the wall. This is especially important with prints, landscapes or designs with a clear top and bottom. With larger sizes, feel free to ask someone to look along or hold it for a moment while you check the position. Unsure about size or position? Read more about measuring a wall.
Applying a wallpaper circle in 6 steps
Anyone who searches for how to apply a wallpaper circle mainly wants a clear step-by-step plan. Below you will find the practical method for most wallpaper circles. Also always check the product specifications of your version.
1. Unroll the wallpaper circle and check the print
Carefully take the wallpaper circle out of the packaging and unroll it on a clean, flat surface. Let the material relax for a moment if it is still curling. Check right away that the top and bottom are clear and see whether the print is undamaged.
2. Clean the wall and let it dry
Wipe the wall with a dry or slightly damp cloth and let the wall surface dry well. No dust, grease or loose dirt may be left behind, because that reduces adhesion.
3. Mark the center and the guide line
Decide on the center of the spot where the wall circle should go. Draw a light vertical line with a pencil. That line helps you start straight. Especially if you wonder how to neatly apply round wallpaper, this is one of the most important steps.
4. Start at the top and work slowly down
With a self-adhesive wallpaper circle, you first remove a small part of the backing. Place the top at the right position and carefully press the first section on. Then keep going while you gradually peel the backing away.
With a glued version, you apply the glue according to the instructions for the material. With non-woven wallpaper, the glue is often applied to the wall. Then place the circle at the marked position and work from top to bottom.
5. Smooth out air bubbles from the center outward
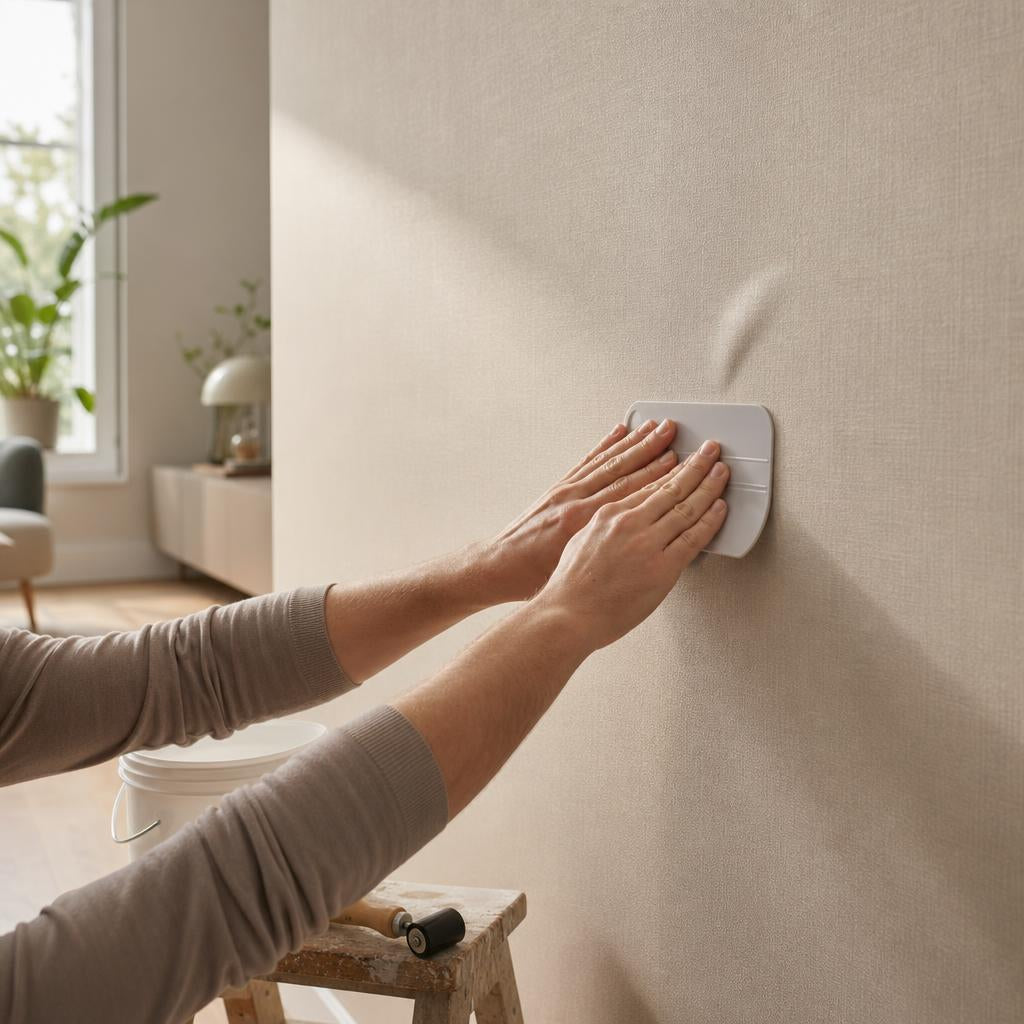
Use a spatula or soft cloth to smooth the wallpaper. Always work from the center toward the edges. This reduces the chance of air bubbles and wrinkles. If a bump still forms, pull the material back a little and smooth it down again.
6. Check the edges and remove glue residue
Press the whole wallpaper circle down firmly once more, with extra attention to the outer edges. Do you see glue residue? Remove it right away with a slightly damp cloth. Then let the circle dry in peace and do not touch it unnecessarily.
Self-adhesive wallpaper circle or wallpaper circle with glue?
Not every wallpaper circle is attached in the same way. That is why it is smart to know in advance which type you have.
Self-adhesive wallpaper circle
A self-adhesive version is handy if you want to work quickly and do not want to use loose glue. You peel the backing off step by step and stick the circle straight onto the wall. This method works especially well on smooth, even wall surfaces.
Wallpaper circle with glue
With a glued wallpaper circle, you use wallpaper glue to attach the material. You often see this with non-woven wallpaper or larger sizes. The advantage is that while placing it, you sometimes have just a little more room to correct. Good glue distribution is important to prevent seams, bubbles or dry spots.
Common mistakes when applying a wallpaper circle to the wall
Most problems do not occur during the application itself, but in the preparation. These are the mistakes you most want to avoid:
- starting on a dusty or damp wall
- not marking a center point or guide line
- working too fast when peeling off the backing
- not smoothing out air bubbles right away
- using too little glue with a non-self-adhesive version
- applying a wallpaper circle to a wall with a strong texture
Not sure if your wall is suitable? Then test a small piece first or check the product information. That way you avoid having to start over later.
How do you attach wall circles without a crooked result?
The question of how to attach wall circles usually comes down to one thing: starting straight. Because a circle has no straight sides like regular wallpaper strips, you notice crooked application less at the start, but especially clearly in the final picture. So always use a central measuring point and a vertical guide line.
Also work calmly and without tension on the material. Never pull too hard on the wallpaper circle to get it into position. That can cause distortion, especially with larger sizes. If you have an XL size or a print that has to line up exactly, applying it with two people often works best.
What do you do about air bubbles, wrinkles or loose edges?
You can usually smooth small air bubbles away right away by rubbing from the center outward with a spatula or soft cloth. Do this with gentle pressure, so you do not damage the print. Do you see a wrinkle while you are still working? Then carefully peel the circle back a little and apply it again.
If an edge comes loose, first check the cause. Often the wall surface there is still dusty, too rough or not glued enough. With a glued wallpaper circle, you can usually still correct the edge by pressing it down firmly again as long as the glue is not completely dry. With a self-adhesive version, it helps to keep the edge clean and dry and rub it down firmly.
Where do you start with patterned wallpaper when it comes to a circle?
With a patterned wallpaper circle you do not work with strips as in traditional wallpapering, but the orientation of the print still matters. Where you start with patterned wallpaper here mainly depends on the top of the design. Think of a landscape, floral print, animal illustration or moon motif where top and bottom clearly differ.
So always start by checking the direction of the print before you begin. Lay out the circle, decide on the top and, if needed, mark it lightly on the back. That way you avoid having a perfectly straight wallpaper circle that still ends up upside down.
Extra tips for a smooth end result
- Work in daylight, so you see air bubbles and crooked placement sooner.
- Use a clean spatula or cloth to prevent smears.
- Rather apply in one calm session than in a rush between other things.
- Ask for help with larger circles, especially above 100 cm.
- Check beforehand that the wall paint is firmly attached.
Besides a wallpaper circle, do you also want to hang other wallpaper? On behang.nl you will also find instruction videos and helpful explanations on, among other things, straight match, offset match, hanging wallpaper horizontally and which wallpaper glue you need.
Frequently asked questions about applying a wallpaper circle
Can you apply a wallpaper circle yourself?
Yes, in most cases you can easily apply a wallpaper circle yourself. With a smooth wall, a clear guide line and calm working you get very far. With larger sizes, an extra pair of hands is useful.
How do you apply a wallpaper circle to your wall without air bubbles?
Start at the top, work gradually downward and always smooth from the center outward. Remove the backing or position the glued part step by step, instead of applying everything at once.
Which glue do you need for a wallpaper circle?
That depends on the material. For a non-woven version you usually use non-woven wallpaper glue. If you have a self-adhesive wallpaper circle, extra glue is not needed. Always check the product information for your version.
Can you apply a wallpaper circle to a textured wall?
That is usually not ideal. On a wall with a clear texture, the material often bonds less well and the wall surface stays visible. A smooth wall gives the best and cleanest result.
How do you attach a small wallpaper circle?
You attach a small wallpaper circle in the same way as a large one, but lining it up is often easier. Precisely because the size is more compact, you sometimes notice crooked placement even sooner. So a guide line really helps here too.
Should you let a wallpaper circle unroll first?
Yes, that is wise. By letting the circle lie flat for a while first, curling is reduced and it is easier to work with while applying.
How do you get the edges nice and smooth?
After applying, press the circle down firmly everywhere once more, especially along the outer edge. Work with a clean spatula or cloth and check right away whether an edge is coming loose anywhere.